How to Integrate Unlayer Into Your Startup in 6 Steps

So, you’ve decided to bring Unlayer into your product — smart move. 🚀
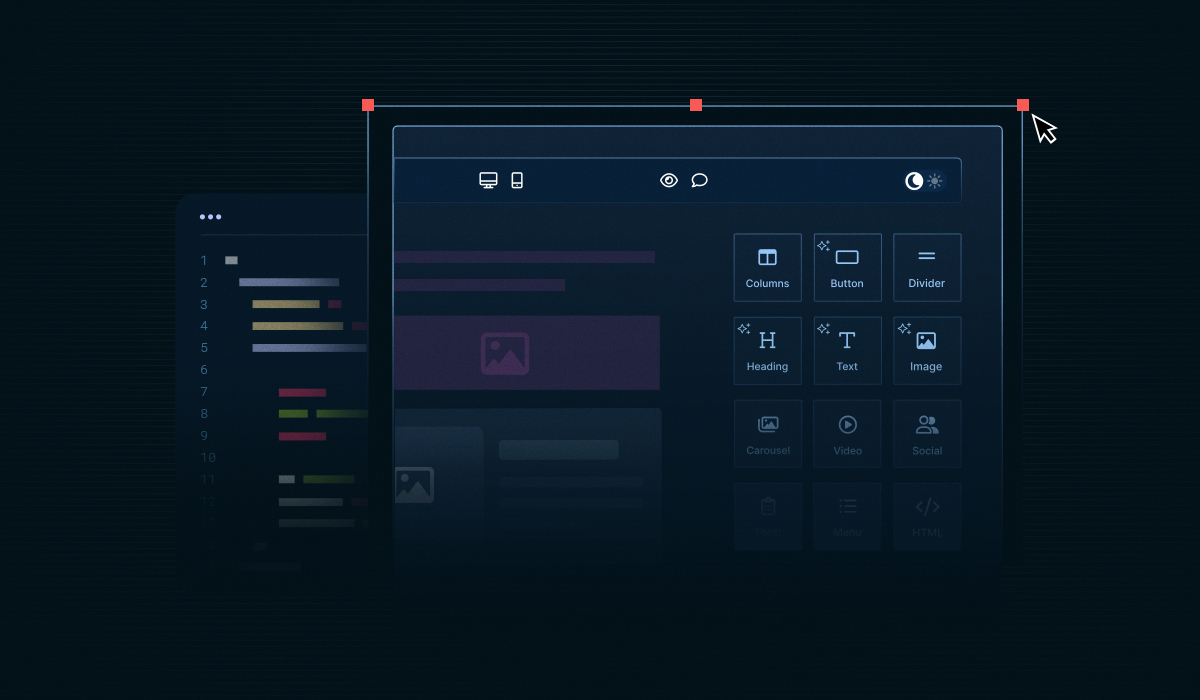
At this point, you already know what Unlayer does and how it helps startups deliver no-code design experiences inside their apps. Now, it’s all about one thing: getting it up and running fast.
Whether you’re embedding the email builder into your marketing platform or using the page builder inside your SaaS app, the integration process is straightforward.
In this guide, we’ll walk you through six steps to integrate the Unlayer SDK into your startup — from adding the JavaScript library to customizing the editor and deploying it — so your team can create and manage content effortlessly.
Let’s dive in.
Step 1: Add the Unlayer JavaScript Library
The first step is adding the Unlayer JS library to your web application. This library loads everything required to run the builder inside your product.
<script src="https://editor.unlayer.com/embed.js"></script>If your startup is built with React, Angular, or Vue, Unlayer has dedicated integration guides to help you get started quickly.
Check them out here:
Step 2: Add a Container for the Editor
Your page must include a container element for the Unlayer editor. Add a blank div where the editor should display.
<div id="editor-container"></div>For the best user experience, we recommend keeping your editor container at least 1024px wide and 700px high. The editor will automatically expand to fill the available space.
Step 3: Initialize the Editor
Now it’s time to bring the editor to life — initialize Unlayer inside the container you created by passing the id as well as configuration options.
Here’s how:
unlayer.init({
  id: 'editor-container', // ID of the container created in previous step
  projectId: 1234, // Add your project ID here
  displayMode: 'email', // Can be 'email', 'web' or 'popup'
});
Step 4: Customize the Editor for Your Product
Unlayer isn’t just an editor — it’s a completely customizable design experience. You can modify it to match your startup’s brand or configure its features for different user roles.
Here are a few ways to do that:
Option | What It Does |
Change colors, UI elements, and layout to match your app. | |
Add dynamic fields like | |
Create custom content blocks for your product needs. | |
Use your own typography for consistency. | |
Enable or disable certain drag-and-drop tools. | |
Add your custom functionality or styling. |
Step 5: Handle Multiple Instances (Optional)
If your app supports multiple editors on one page or uses a Single-Page Application (SPA) structure, you can create multiple Unlayer instances easily:
const editor = unlayer.createEditor({
  id: 'editor-container',
  projectId: 1234, // Add your project ID here
  displayMode: 'email',
});
editor.loadDesign({});
editor.exportHtml(function (data) {});
This flexibility means you can use Unlayer for different design types within the same platform — like an email builder, a popup builder, a page builder, and a document builder — all under one roof.
Step 6: Deploy to Production
Once everything works perfectly in development, it’s time to go live.
Log in to your Unlayer Developer Console.
Pass your
projectIdwhen initializing the Unlayer builder.In your Project > Settings > Deployment, add your allowed domains — so the builder only runs on authorized URLs.
And that’s it — your Unlayer integration is live, secure, and ready to power stunning designs right inside your product. 🚀
Final Thoughts
Building a great product isn’t just about functionality — it’s about giving users the tools to express their creativity. By choosing to integrate Unlayer, your startup can deliver exactly that, without spending months reinventing the wheel.
Whether you’re launching a CRM, an email marketing app, or any other SaaS product, integrating Unlayer will make it more powerful, scalable, and user-friendly — in just a few lines of code.
Ready to give your users the editor they’ll love? Get started with Unlayer and bring a world-class design experience to your product.
FAQs About Integrating Unlayer in a Startup
Q1: How secure is the Unlayer integration?
Very secure. You can specify allowed domains in your project settings so your editor only works within approved environments — preventing unauthorized access or misuse.
Q2: Can I extend Unlayer’s functionality with my own features?
Definitely. Unlayer lets you add custom tools, blocks, and JS/CSS, giving you complete control over how the editor behaves and what it can do inside your platform.
Q3: What if I need help during integration?
You can always refer to Unlayer’s documentation or reach out to the support team for guidance.
Q4: Is Unlayer affordable for startups?
Absolutely. You can start completely free with the Forever Free plan, then scale up as your business grows with flexible pricing tiers that stay predictable and transparent. Each plan adds value — from white-labeling and API access to AI-assisted writing and custom branding — without forcing you into enterprise-level pricing too soon.
Founders often wonder how Unlayer fits into their early-stage budgets. If you’re one of them, we’ve covered it all in detail here:
👉 Read our full blog: Is Unlayer Affordable for Startups and Small Businesses?
Q5: Can I switch between different Unlayer builders in the same app?
Yes! Unlayer lets you use multiple builders — like email, page, popup, and document builders — all within the same platform. You can easily switch between builders based on your use case, giving your users a consistent design experience across different content types.