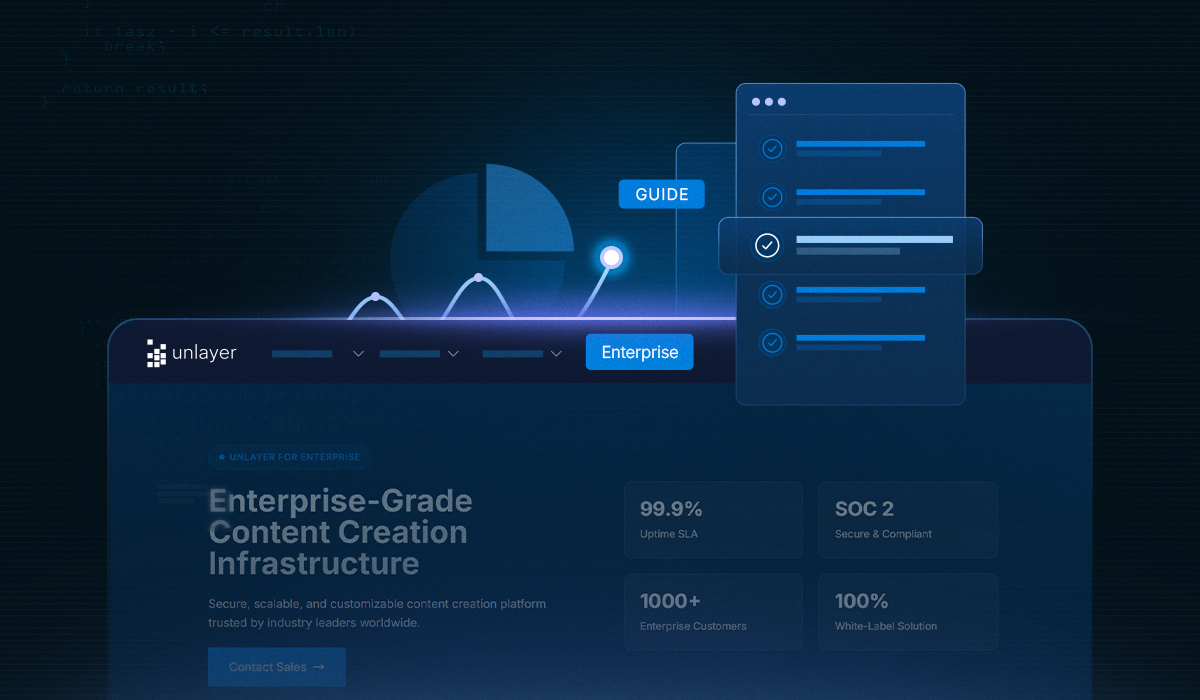
Unlayer Enterprise: Your Guide to Embeddable Tech at Scale
An in-depth Enterprise-focused overview of choosing an embeddable builder built for compliant workflows, flexible deployment, & fast team-wide content creation.


Whether you’re running a CRM, a marketing platform, or an internal communication tool, a native-feeling editor lets your users create polished emails, pages, popups, or documents without ever leaving your app.
And when it’s done right, it dramatically reduces the development hours you’d otherwise spend maintaining custom builders, UI quirks, and countless feature requests.
This guide is written for beginners who want a simple, no-fluff walkthrough, yet still require sufficient technical depth to truly integrate Unlayer into an enterprise-grade stack.
You will walk away knowing how to integrate Unlayer into your frontend, connect it to your backend, and customize it to meet the expectations of enterprise teams.
Before we dive in, it’s important to understand the two ways you can run Unlayer inside your product:
Cloud (SaaS): Fastest to set up, hosted by Unlayer, and perfect if you want quick embedding with minimal infrastructure work.
On-Premise: Fully self-hosted using Unlayer’s SDK bundle, assets, and license. Ideal for enterprises that need strict data control, custom storage for blocks and uploads, or deeper compliance guarantees.
In this guide, we’ll cover the entire journey:
Installation → customization → full enterprise workflows.
At its core, Unlayer is built to integrate directly into your product, much like a modular content editor that can be dropped into any workflow.

Instead of forcing teams to jump between external tools, Unlayer lets you bring a full-featured Email, Page, Popup, or Document builder inside your own UI.
Each mode uses the same underlying editor, but loads a different configuration depending on what your end-users need to create.
Under the hood, everything runs through Unlayer’s JavaScript SDK and API, which gives you full control over how the editor initializes, loads & saves designs, and interacts with your backend.
The official plugins are also available for modern frontend frameworks, like Angular, React, and Vue.
Before you integrate Unlayer into your product, it's helpful to have a clear understanding of what you’re working with.
Think of this as your setup sanity check, the things that ensure smooth embedding now and fewer surprises later.
Unlayer gives enterprises two ways to run the editor:
Ideal if you want the quickest path to integration. You simply load the hosted script, point it to your project, and let Unlayer handle hosting, updates, and scaling behind the scenes.
Better suited for use in a security-sensitive environment. You’ll receive a full SDK bundle and assets to host everything on your own servers, such as fonts, blocks, uploads, and the editor itself. Great for nothing leaves our network scenarios.
Choosing between them upfront helps define your infrastructure, storage, and compliance flow.
Unlayer supports several creation modes, and enterprises often use more than one:
Email Builder for campaigns and automated messaging
Page Builder for landing pages or web experiences
Popup Builder for onsite modals and overlays
Document Builder for proposals, reports, etc
Pick the mode that aligns with your product’s workflows. You can switch or embed multiple modes if your platform spans different channels.
Enterprises often have more guardrails than typical SaaS teams do. Before embedding:
Ensure domain allowlists are set correctly
Check whether your organization needs SSO, role separation, or audit logging
Plan permissions around who can edit what templates, assets, blocks, and fonts
A little planning here prevents last-minute panic during deployment.
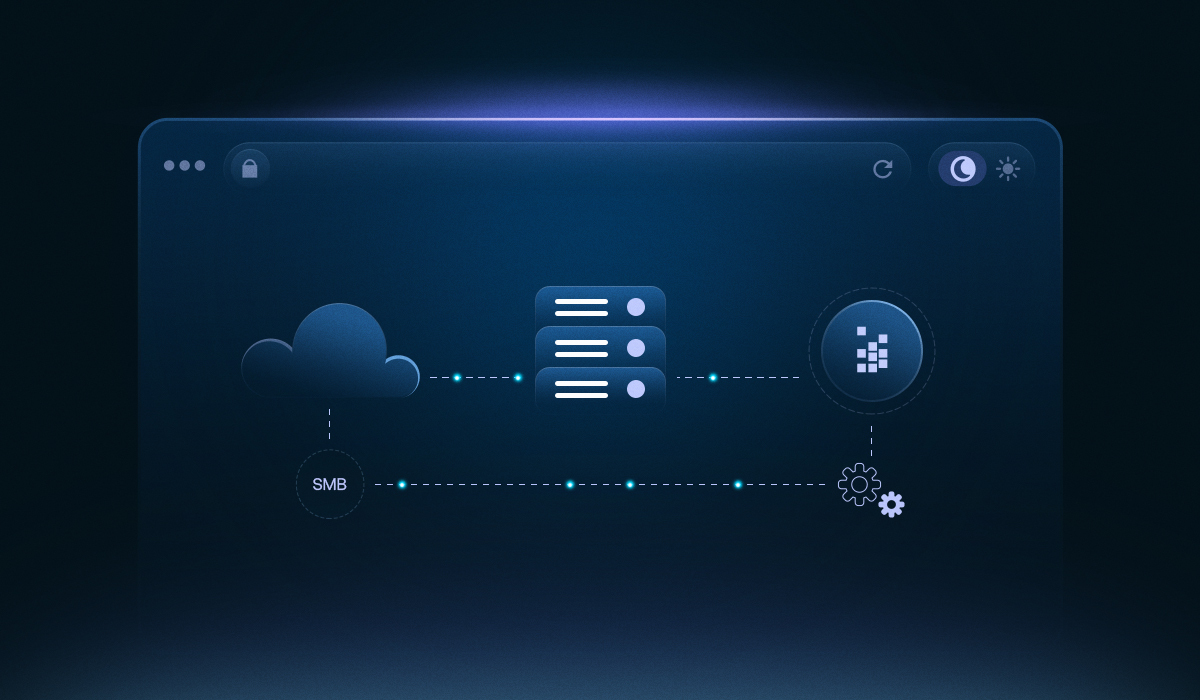
On-premise deployment gives you complete control, but it also requires a bit more groundwork:
Ensure you have a stable environment to host the editor bundle and assets, such as a CDN, file server, or internal hosting.
You’ll need locations for:
Custom blocks
User uploads
Font files
Since nothing is stored in Unlayer’s cloud, your system becomes the source of truth.
Decide whether you’ll serve assets through a CDN (recommended for speed) or keep everything strictly internal for compliance reasons.
Once your checklist is in place, it’s time to pull everything together. Let’s get started!
Setting up Unlayer on the cloud side is incredibly straightforward. You’re essentially adding a script, placing a container, and initializing the builder; nothing heavy, nothing complicated.

Before you drop in any code, start by deciding how you want to utilize Unlayer within your enterprise stack.
If you're evaluating advanced needs, such as SSO, multi-tenant structure, on-premise deployment, or deep permission controls, it’s worth booking a demo with the Unlayer team to walk through the Enterprise plan and see how it fits your product.
If you’re ready to begin right away, sign up for a Unlayer account and begin embedding it into your application.
Start by loading Unlayer’s embed script into your app. This single line gives you access to the editor, customization options, and all the UI components needed for a smooth editing experience:
<script src="https://editor.unlayer.com/embed.js"></script>If your app already uses a modern framework, Unlayer also provides official npm packages for:
Each package comes with its own integration guide and ready-to-drop-in code samples, so you can mount the editor like any other component in your project.
Create a simple container where the editor will appear:
<div id="editor-container"></div>Pro tip: Give the container plenty of breathing room, at least 1024px wide and 700px tall, so the builder renders cleanly across screen sizes. This prevents clipping, awkward scrollbars, and cramped editing views for your team.
Now, let’s initialize the editor inside the container you just created by passing its ID and configuration options.
unlayer.init({
  id: 'editor-container', // ID of the container created in previous step
  projectId: 1234, // Add your project ID here
  displayMode: 'email', // Can be 'email', 'web' or 'popup'
});
Initialization is also where you start tailoring the editor to match your workflow. At this stage, you can:
Set the default locale
Pass user data for personalization
Register merge tags tied to your CRM or internal data
Add your own blocks, tools, or fonts
Configure default branding or styling rules
This step is where Unlayer starts feeling less like a generic builder and more like a native part of your product.
Before going live, double-check two final items:
Add your production domain(s) to the Allowed Domains list in your Unlayer project.
Use the correct projectId when initializing the editor in production.
Once that’s squared away, your team can design and personalize content directly inside your platform.
If you’re opting for Unlayer’s On-premise setup, the process looks slightly different, but not more complicated.
The editor is built with on-premise usage in mind as well, so the SDK behaves the same way as the cloud version.
The only major difference is where everything is hosted.
Unlayer provides:
A JS SDK bundle
All required assets
An encrypted license file
You’ll place these on your own servers or internal CDN. This keeps everything, editor UI, fonts, images, and uploads, within your private infrastructure.

Unlike the SaaS version (where blocks are stored in Unlayer’s cloud), on-premise requires you to host and serve blocks from your own database. You will have to use the JavaScript API to load and store them in your cloud:
Here’s how you can do that:
unlayer.registerProvider('blocks', function (params, done) {
console.log('blocks provider', params);
done(blocks);
});
Here, 'blocks' represent the block object from your database.
You can also listen for block-level events like additions, edits, or removals, using the callbacks in the Custom Blocks documentation.
For on-premise deployments, all user-uploaded images live in your infrastructure, not Unlayer’s.
You’ll use the User Uploads JavaScript API to store image references and fetch them when needed.

Unlayer provides a full example for custom databases, which you can mirror to match your architecture.
Font management also shifts to your side. Instead of the SaaS dashboard, you’ll define custom fonts directly in unlayer.init():
unlayer.init({
  fonts: {
    showDefaultFonts: true,
    customFonts: [
      {
        label: "Comic Sans",
        value: "'Comic Sans MS', cursive, sans-serif"
      },
      {
        label: "Lobster Two",
        value: "'Lobster Two', cursive",
        url: "https://fonts.googleapis.com/css?family=Lobster+Two:400,700"
      }
    ]
  }
});
This is ideal for enterprises with strict brand guidelines that require specific font sets across emails, pages, and documents.
Once your custom blocks, uploads, fonts, and asset paths are wired up:
Point your app to the hosted on-premise SDK
Initialize the editor using the same JavaScript APIs you would with SaaS
Validate your license and ensure everything resolves correctly behind your firewall
From there, the experience is identical to the cloud version, but fully under your control.
Managing designs in an enterprise setup boils down to three core tasks: loading designs, saving/exporting output, and controlling personalization.
Unlayer gives you direct APIs for all three, so you can store content in your own systems and connect it to your email or web workflows without friction.
Unlayer’s builder works entirely in JSON, making designs easy to store, reload, and version in your database.
Use this when opening saved templates or user drafts:
var design = {...}; // template JSON
unlayer.loadDesign(design);Export both the editable JSON and the final rendered HTML:
unlayer.exportHtml(function (data) {
  var json = data.design; // The design JSON structure
  var html = data.html; // The final HTML of the design
  // Save the JSON and/or HTML
});Listen for real-time updates and persist changes automatically:
unlayer.addEventListener('design:updated', function (updates) {
  // Design has been updated by the user

  unlayer.exportHtml(function (data) {
    var json = data.design; // The updated design JSON
    var html = data.html; // The updated HTML

    // Auto-save the JSON and/or HTML here
  });
});Save JSON for re-editing
Save HTML for sending or rendering
Beyond JSON and HTML, Unlayer can export designs into other formats depending on where you deliver them:
HTML (most common for email delivery)
Plain text
Image
ZIP package
Use the export options that match your sending layer, ESP, CRM, custom email engine, or automated workflow.
Merge tags are placeholders like {{first_name}} that get replaced with real customer data at send-time. You define them during initialization:
unlayer.init({
  mergeTags: {
    first_name: {
      name: 'First Name',
      value: '{{first_name}}',
      sample: 'John',
    },
    last_name: {
      name: 'Last Name',
      value: '{{last_name}}',
      sample: 'Doe',
    },
  },
});
You can also:
Group tags into sub-menus (e.g., Shipping Address)
Update merge tags dynamically with unlayer.setMergeTags()
Add conditional or looping rules for advanced personalization
Customize the merge tag picker UI with registerCallback()
Control autocomplete triggers and sorting behavior
Unlayer gives you two flexible pathways for handling templates, along with built-in governance tools that help enterprises maintain brand integrity at scale.
Unlayer’s built-in Template Manager (found under Library → Templates in the Developer Console) is ideal when you want a simple, centralized space where teams can create, update, and collaborate on templates.
Each template receives a unique templateId, which you can load directly:
unlayer.init({
  projectId: 1,
  templateId: 123,
});
Or load it after initialization:
unlayer.loadTemplate(1); // 1 is the templateIdIf you need tighter control, for example, integrating templates with internal systems or meeting compliance rules, you can store templates entirely in your own database.
Templates are simply design JSON:
var template = {...}; // template JSON
unlayer.loadDesign(template);Enterprises often need to lock down certain parts of a template (headers, legal footers, brand blocks) while allowing users to customize others.
Unlayer provides Editor Mode specifically for this purpose.
unlayer.init({
  designMode: 'edit', // default value is 'live'
});
Turning on designMode: 'edit' adds an Admin section to the editor panel with granular controls for every row, column, and block.
Admins can set whether a block is:
Selectable
Draggable
Duplicatable
Deletable
Hideable
Locked
For example, a company can lock the header and footer of an email template to ensure branding and legal information stay intact, while leaving the body open for customization.
These permissions also enable you to create templates with varying levels of flexibility for different teams, ideal for multi-brand, multi-region, or role-based environments.
In an enterprise-level integration, Unlayer goes beyond simply providing a solid editor. It offers the controls and flexibility to align with large team structures, compliance, and brand strategies.
User Roles & Access Control: Unlayer supports granular roles (like Owner, Admin, Editor, Contributor) so you can precisely define who can create, modify, or manage templates.
Single Sign-On (SSO): Enterprises can integrate via SAML, OAuth, or custom authentication to centralize login and simplify user management.
Audit Logs & Security: With the Enterprise plan, you get detailed audit trails, encrypted data, and access controls to meet compliance standards (SOC 2, GDPR, etc.).
Merge Tags: Use Unlayer’s mergeTags configuration to define dynamic placeholders (e.g., {{first_name}}) that are replaced later when sending.
Display Conditions: With display conditions, you can control which content blocks are shown based on logic, for example, showing a special message only if a condition is met.
Design Tags: These are variables that can be set for the editing session (e.g., [[ business_name ]]), so the builder UI itself can feel personalized.
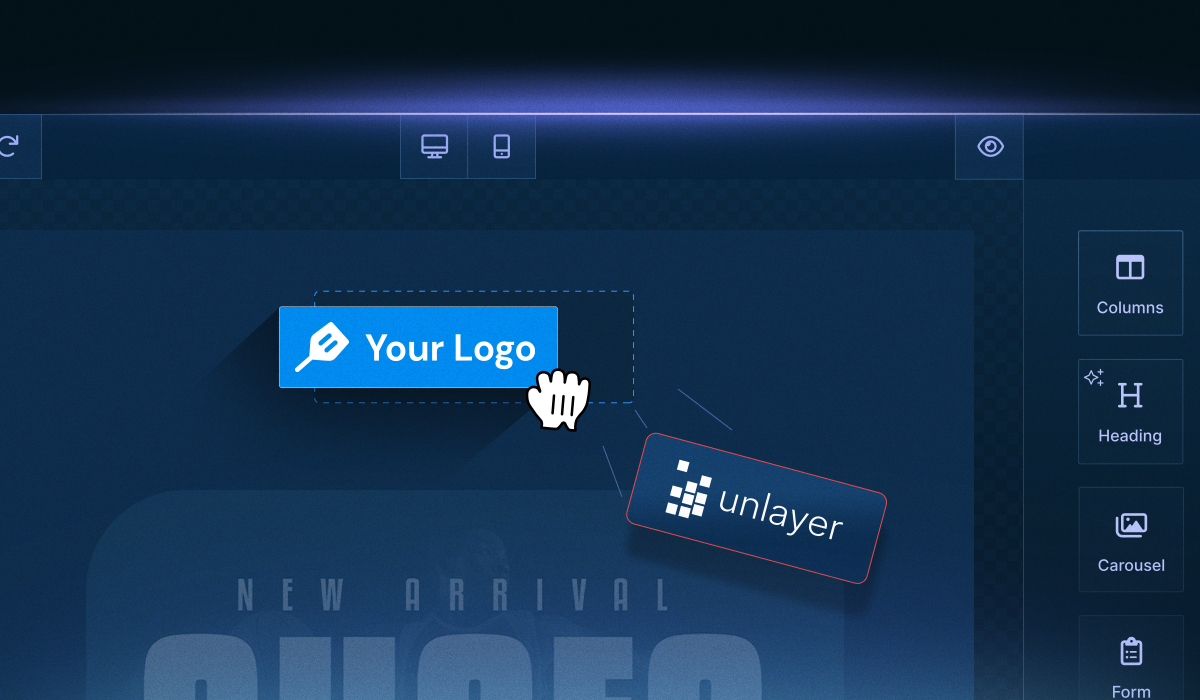
On the enterprise plan, you can completely white-label the editor, so the editor appears under your brand with no Unlayer logos visible to end-users.
You can customize logos, themes, fonts, and even domains to match your brand’s identity. Other advanced customization options include:
This ensures that when your teams access the editor, it feels like part of your product, not a third-party tool.
Unlayer Enterprise runs smoothly for most teams, but if you ever hit a snag, whether the editor refuses to load, certain features go missing, watermarks still appear, or your custom tools don’t show up, Unlayer's support guide is your one-stop shop for troubleshooting all of those issues and more.
Embedding Unlayer into your enterprise stack doesn’t just give your team a powerful editor; it gives your product a flexible, scalable content engine that grows with every workflow, channel, and team you support.
With the right setup, Unlayer becomes an extension of your platform: fully branded, governed, and integrated into your backend systems.
By now, you’ve seen how to embed it, customize it, manage data cleanly, and support enterprise-grade needs like permissions, dynamic content, and multi-tenant structure. Whether you choose SaaS or on-premise, the path forward is the same: start small, configure intentionally, and let your template system mature alongside your product.
Most importantly, embedding Unlayer into your enterprise stack means you’re not just offering an editor, you’re empowering your users to design, personalize, and launch content confidently, without leaning on developers for every update.
If you're ready to take the next step, explore deeper integrations, build your custom blocks, or refine your governance workflows, Unlayer has the tools (and documentation) to support you at every stage.
Yes. Unlayer is designed to work inside multi-tenant environments, including SaaS platforms with multiple brands, clients, or sub-accounts. On Enterprise plans, you can fully white-label the interface so end-users never see Unlayer branding.
Unlayer’s editor itself is lightweight and runs in the browser, so scalability mostly depends on how you manage storage and serving of designs, templates, uploads, and assets.
SaaS deployments automatically leverage Unlayer’s optimized infrastructure.
On-premise deployments scale with your own CDN or internal hosting.
Since all designs are JSON-based and interactions are event-driven, Unlayer remains fast even in large teams with heavy usage.
Absolutely. Unlayer is intentionally workflow-agnostic. You can plug in your own approval flows, publish buttons, version histories, and access rules through event listeners, such as design:updated, custom buttons, or backend triggers.
Most enterprises layer Unlayer into existing content governance systems instead of replacing them.
Yes, especially with on-premise deployment. Because you can self-host assets, store all user data internally, and enforce controlled access through SSO and permissions, Unlayer can operate entirely behind your firewall.
Many compliance-heavy industries utilize Unlayer to centralize content creation, keeping data within their own infrastructure.
Unlayer allows you to fully customize the editing experience by enabling, disabling, or modifying specific tools, blocks, and UI elements.
You can hide advanced features for basic users, expose more controls for admins, or tailor different toolsets for different tenants. This makes it easy to create role-based or brand-specific editing environments without maintaining multiple editors.
Insights on email design, content creation, and developer productivity.
An in-depth Enterprise-focused overview of choosing an embeddable builder built for compliant workflows, flexible deployment, & fast team-wide content creation.
A detailed guide on how Unlayer, a white-label builder for agencies, streamlines SMB marketing, boosts revenue, and simplifies client content creation.
A practical guide to how SMBs integrate Unlayer with their CRM and marketing stack for seamless design-to-campaign workflows and consistent branding.